![]()
![]()
![]()
![]()
You just got off the phone with Microsoft technical support, having waited on hold for what seemed like an eternity. The support representative referenced a KnowledgeBase article Q-seven million or something like that, and told you that you need to edit the Registry and make a change to one of the keys.
In every instance when Microsoft recommends editing the Registry, they put in a warning/disclaimer reminding you of the fragile nature of the Registry, and urge you to back it up before continuing.
So, before you continue, back up the Registry now!
The Windows NT Registry Editor is REGEDT32.EXE, located in the \WINNT\SYSTEM32 directory. There is no icon or menu item in the Start menus on purpose. With an icon or a menu item, users would be more likely to edit the Registry, creating significantly more work for the administrators of the network.
The limitations of who can use the Registry Editor are different, depending on whether you are connected to a domain. If you are not connected to a domain, logging on as Administrator to your local machine will allow you to edit the Registry.
To edit the Registry of a domain-connected NT system, you must be a member of either the Administrators or Power Users group, or from a trusted domain who has been granted access to those groups.
Usually, the easiest way to start the Registry Editor is to launch it from the Start-Run dialog box. Simply type REGEDT32 and press Enter. There is no need to enter the directory path because the directory is automatically in the environment variables.
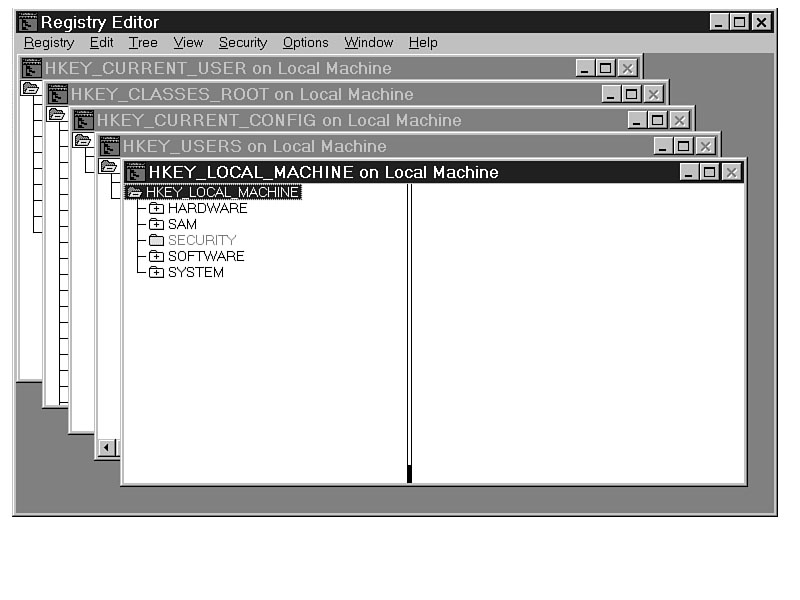
At launch, you'll see the screen shown in Figure 9.1.
Figure 9.1. Cascading windows of REGEDT32.EXE.
For a quick review of the structure of the
Registry, see Chapter 2, "The Structure
of the Registry."
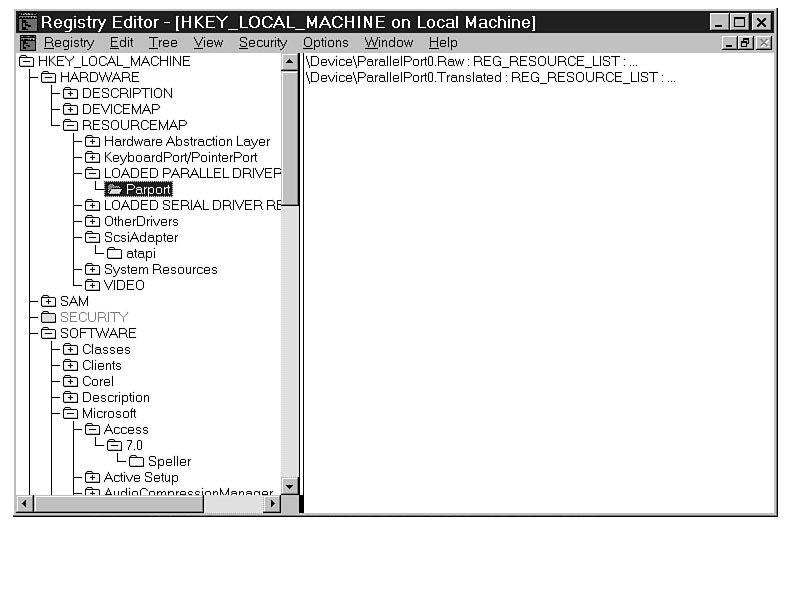
For each handle key window, the left pane in the screen shown in Figure 9.2 shows the keys and subkeys (considered the same for this discussion). They are organized in expandable branches. Any branch that has subkeys is shown with a plus (+) sign in the folder icon. Double-clicking the folder expands the branch. After the branch has been expanded, the plus sign is replaced with a minus (-) sign, indicating that the branch may be collapsed.
TIP: Before you edit and change the look of the windows, panes, and branches in the editor, deselect the Save Settings on Exit option in the Options menu. The next time (and every time) you start the editor, it will have the same clean look.
Figure 9.2. REGEDT32.EXE with expanded and collapsed folders.
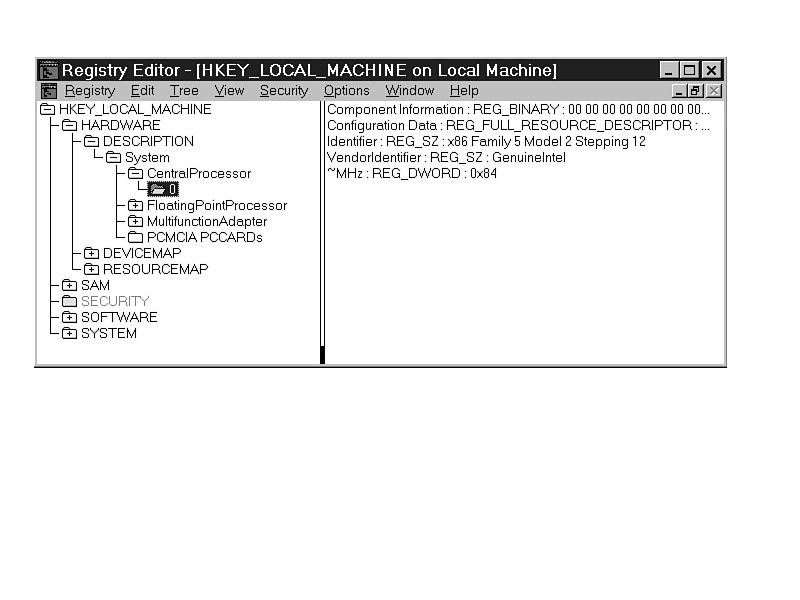
The right pane of Figure 9.3 shows all the values in the key that are highlighted
in the left pane. If no values are shown, that means that values
exist only in the
subkeys. The syntax for a value is ValueName:ValueType:Data.
Start with the most common function in Registry editing: editing a current entry in the Registry.
Figure 9.3. REGEDT32.EXE value syntax.
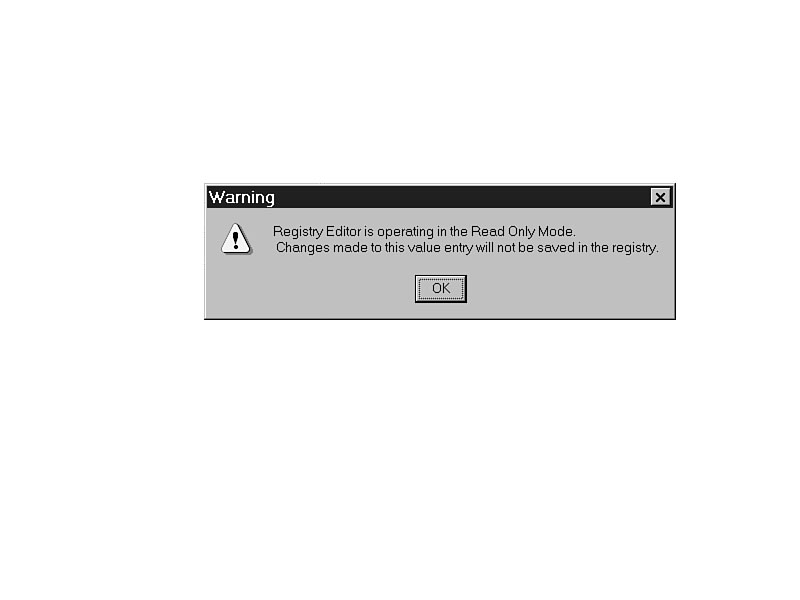
WARNING: Whoa! Back up the ponies! Before you continue, you need to know the most important menu option there is: Read Only Mode. As discussed earlier, any entry in the Registry is immediate and permanent. One mistake and boom! You may have made an error that will test the validity of your backup. To protect yourself while you are looking around, go to the Options menu and select Read Only Mode. It is a toggle switch, allowing you to go back and forth quickly and easily. A warning dialog (in many cases, a welcome sight) tells you when you are in Read Only Mode. (See Figure 9.4.) With the editor in Read Only Mode, changes are preceded with a warning that you are working in Read Only Mode. None of the changes you make take effect.
Figure 9.4. Read Only Mode warning in REGEDT32.EXE.
TIP: If your Registry Editor is set in the Options menu to Save Settings on Exit and also to Read Only Mode, REGEDT32.EXE will be in Read Only Mode as an added safety belt for the user the next time you start it.
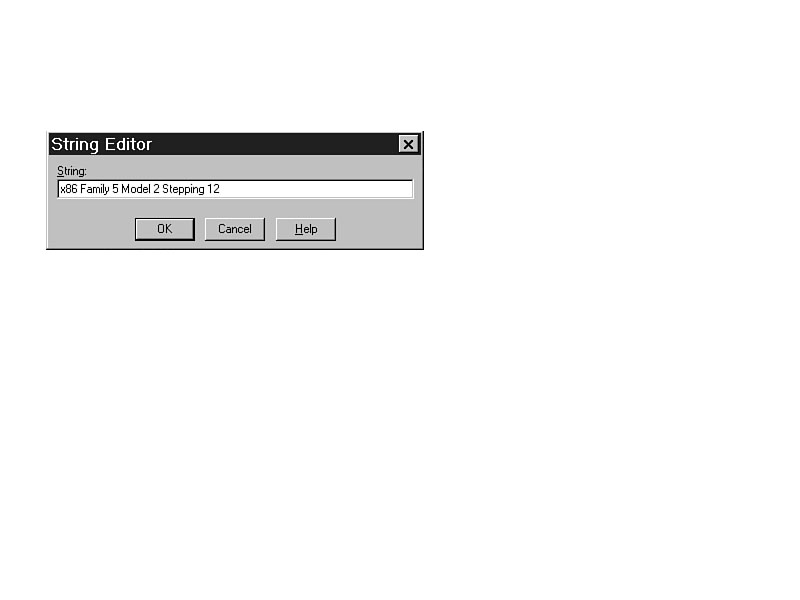
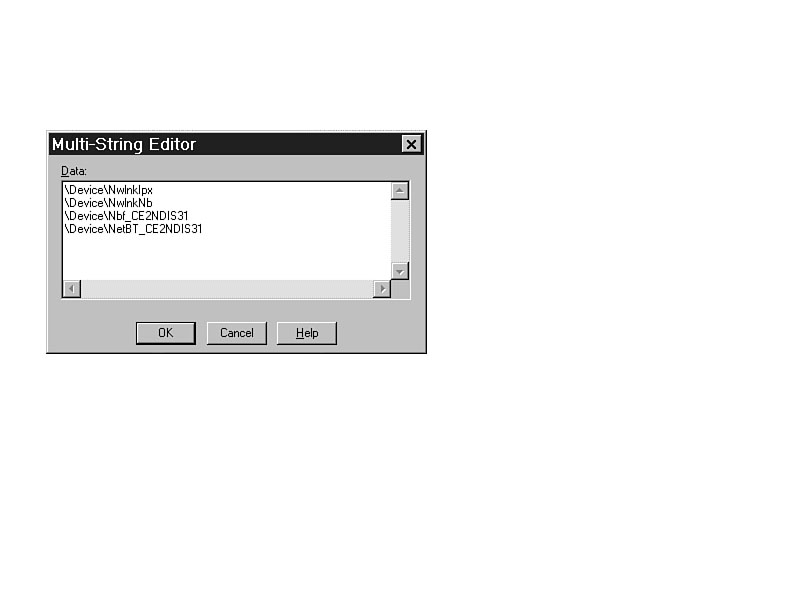
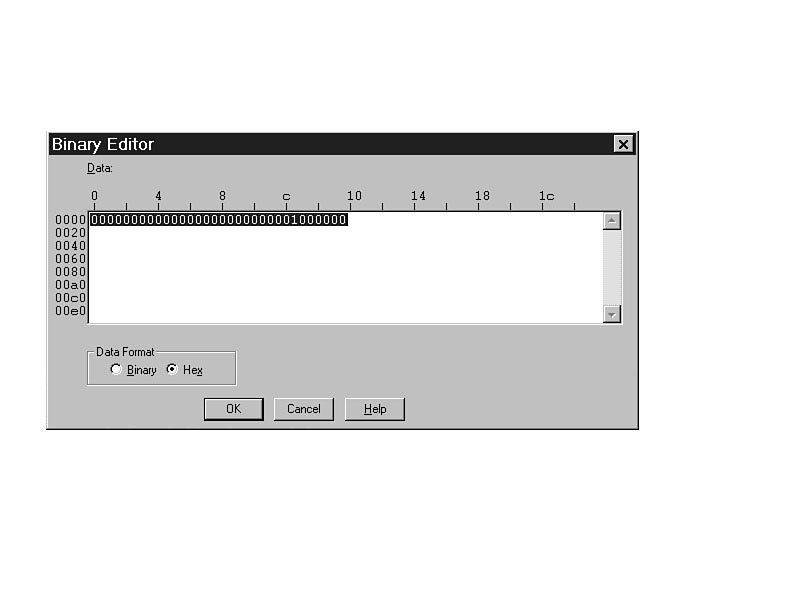
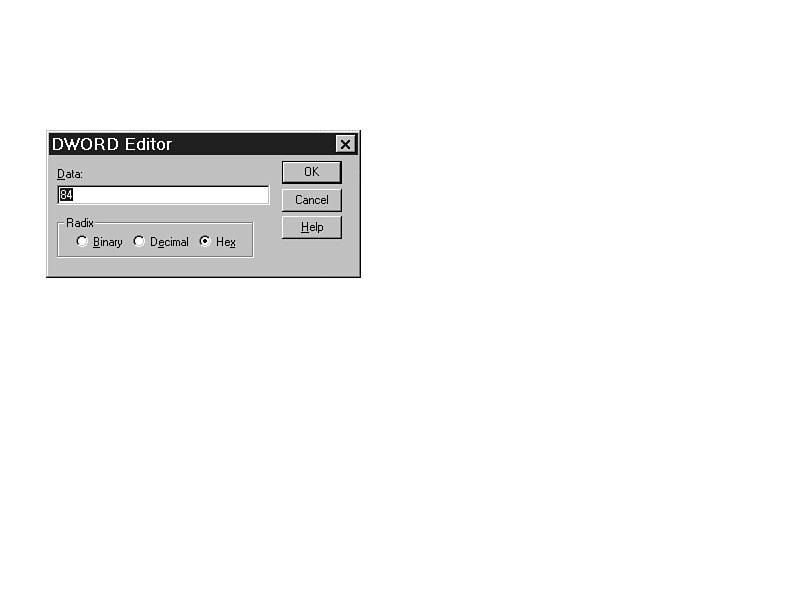
To edit a value, double-click it. Double-clicking invokes the proper editor. There is a separate editor for strings, including expandable strings (see Figure 9.5), multiple strings (see Figure 9.6), binary data (see Figure 9.7), and DWORD (see Figure 9.8). When you edit DWORD and binary information, you have additional choices to work in binary, hexadecimal, or decimal format.
Figure 9.5. Editing data with the String Editor.
Figure 9.6. Editing data with the Multi-String Editor.
Figure 9.7. Editing data with the Binary Editor.
Figure 9.8. Editing data with the DWORD Editor.
Enter the information, watch the system save it automatically (by watching the hourglass
light up), and you can exit safely. The update is automatic, but depending on the
type of information you changed, it may not take effect immediately. Changes to some
types of information take effect immediately. Others wait until you log off and back
on, and others wait until you restart your system.
NOTE: Determining when Registry information gets used can help you determine what actions are required to activate the update. If you have updated software, drivers, settings for hardware, or similar information, a restart is normally required because the information is used at startup. If the information is user-based, you'll usually be required to log off and back on again. Sometimes, the update takes effect immediately, allowing you to continue working; unfortunately, that is quite rare indeed.
For easy reference, here is a list of steps to edit a value in the Registry:
If the value you need is not currently present, you can easily add one. All values are listed in alphabetical order, so it makes it easy to find them.
WARNING: If you add a key or value that is not understood by Windows NT because of spelling errors or because it is not a recognizable entry, nothing happens in most cases. I have experimented many times by adding entries similar to those found in Windows 95 without damaging the system. If Windows NT cannot use the information, it simply ignores it.
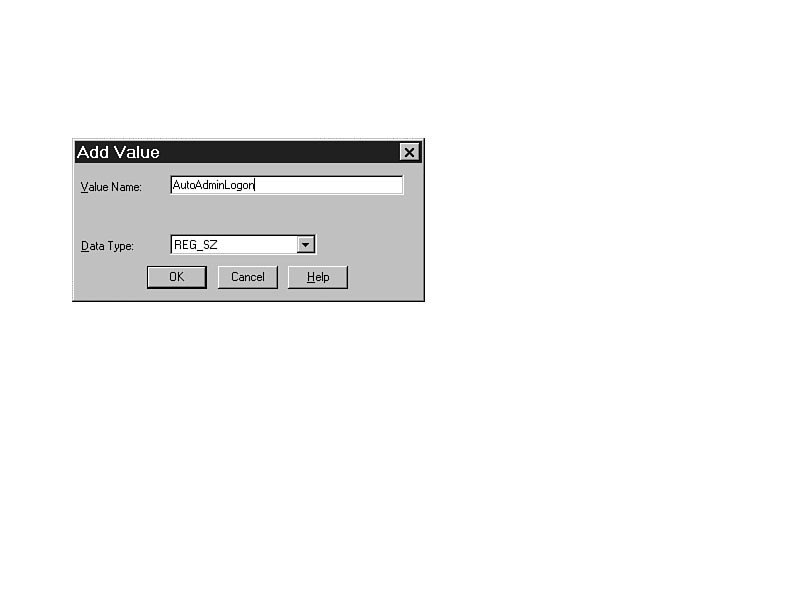
To add a value to a key, highlight the key, and select Edit | Add Value. Figure 9.9 shows the Add Value dialog box. You are prompted for the value name and data type.
Figure 9.9. The Add Value dialog box in REGEDT32.EXE.
TIP: Remember that the values are not case-sensitive, but they are spelling-sensitive.
Most of the new entries you create are regular string values unless you specifically direct them to be otherwise.
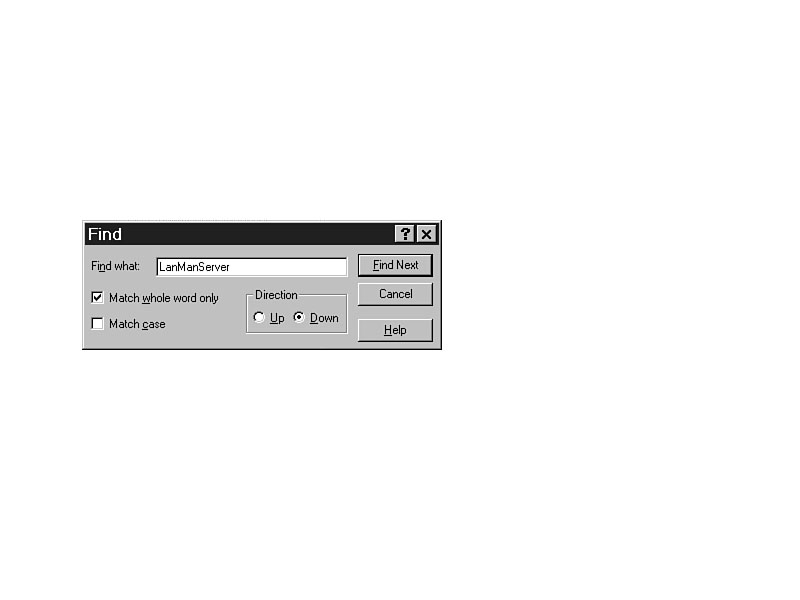
If you are not sure where the key is, you can locate it using View | Find Key. (See Figure 9.10.) The editor searches the Registry for the key name and moves your highlight there. However, it searches only in the current handle key, and only in the order listed in the dialog box.
Figure 9.10. Finding a key with REGEDT32.EXE.
The search starts at the key that is currently highlighted and goes up or down from
there. If a match is found, your highlight moves there. The Find Key dialog box remains
open, giving you an opportunity to
continue your search by clicking the Find Next
button. If another match is found, the tree expands as necessary and highlights the
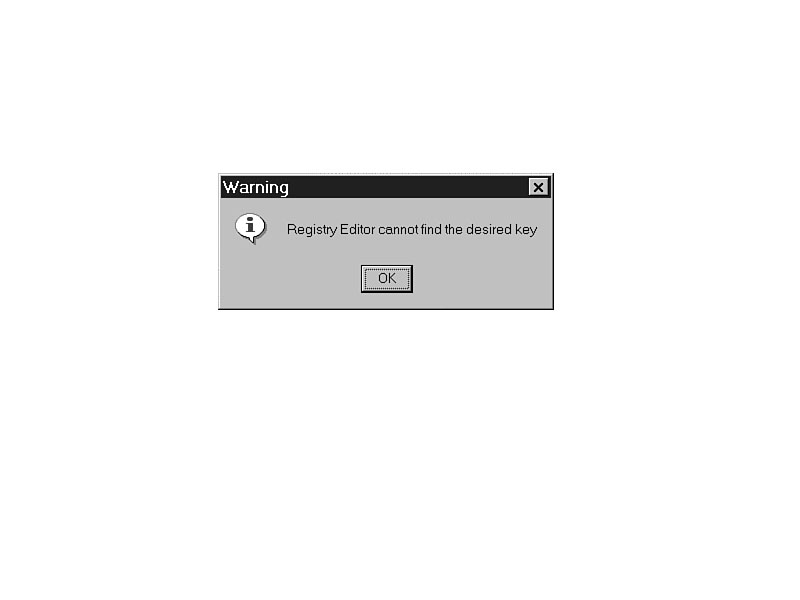
next match. If there is no match to your request, you are then informed by an error
dialog box. (See Figure 9.11.)
Figure 9.11. Unable to find a key with REGEDT32.EXE.
Unfortunately, the search capabilities of
REGEDT32.EXE are extremely limited.
If you don't start from the right place or search in the right direction, your search
is unsuccessful. Searching only for keys is also very limiting. To ensure the best
results, start from the handle key
(such as HKEY_CURRENT_USER), and use
wildcard characters (* or ?) to extend your search through the
entire key.
To extend the search capabilities of REGEDT32.EXE, use the shareware program REGSRCH.EXE, included on the CD-ROM with this book.
By default, the Registry can be edited only by members of the Administrators or Power Users groups. Each user in those groups, however, has equal access.
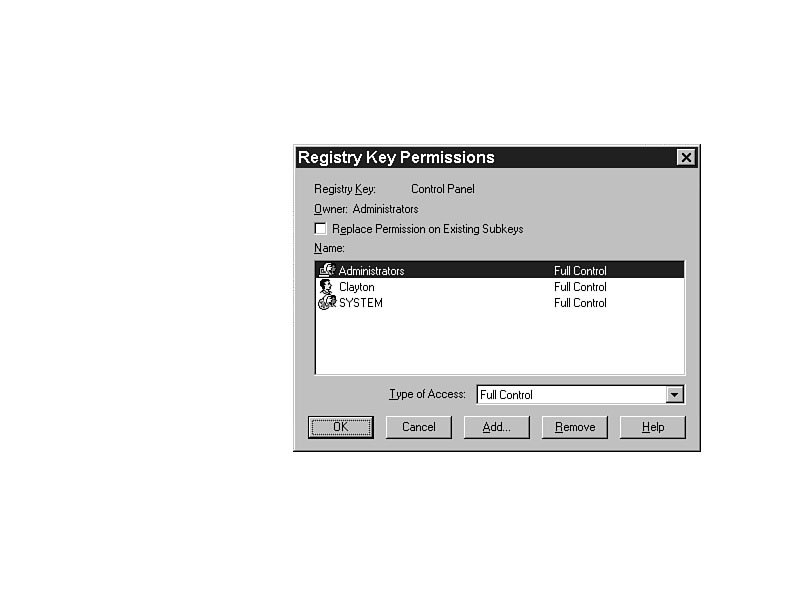
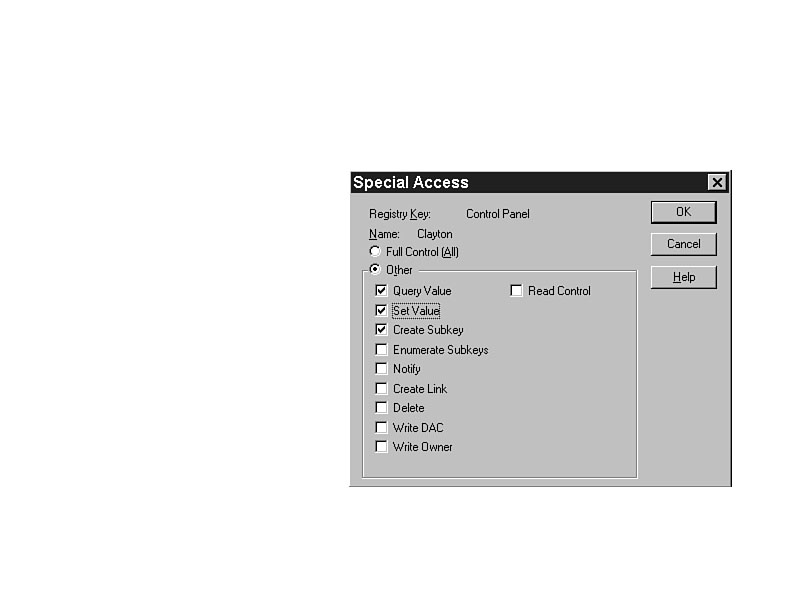
To add users or groups, highlight the key and select Security | Permissions. Current permissions are shown in the resulting dialog box. (See Figure 9.12.) To change the current permissions of the groups or individual users, highlight the name and select the type of access in the dialog shown in Figure 9.13.
Figure 9.12. Setting permissions with REGEDT32.EXE.
Figure 9.13. Special access options with REGEDT32.EXE.
To add others so they can also participate in Registry security, click Add and choose
from the list of groups and users. Then determine the level of permissions they will
receive. The permission changes will take
effect immediately.
REGEDT32.EXE allows you to set permissions for individual users or groups to restrict access to the Registry. The standard permissions are Read and Full Control. Read access allows users to see the Registry entries, but not to change them. It is the default setting for the Everyone group. Full Control allows the user to read and change entries, including editing, adding, and deleting entries. It also includes permission to restrict other users from editing the Registry, and to take ownership of keys and subkeys. By taking ownership of a key with the Write Owner permission (included in Full Control), it is possible to determine who will be able to access the Registry, and in which way.
For more specific settings and permissions, select Special Access as shown in
Figure 9.13. Table 9.1 shows the permissions and what they allow a user to do.
Table 9.1. Special
access permissions.
| Permissions | Allowed function |
| Query Value | Read a value entry from a Registry key |
| Set Value | Set a value entry in a Registry key |
| Create Subkey | Create a subkey on a selected Registry key |
| Enumerate Subkeys | Identify the subkeys of a Registry key, such as by expanding the tree view |
| Notify | Notify events from a key in the Registry |
| Create Link | Create a symbolic link in a particular key |
| Delete | Delete a Registry object |
| Write DAC | Change the security permissions of a key |
| Write Owner | Take ownership of a key |
| Read Control | Read the security permissions of a key |
WARNING: Always remove the Everyone group from any permission settings to increase security. It is not related to any domain, and any user who can get into your system in any way is part of the Everyone group. If you want your domain users to be able to read the Registry but not edit it, set the Read permission for the Domain Users group. Then, unless the user is part of the domain, he cannot even see it.
Determine what the security should be on keys and subkeys according to your organization's security policy. Then set those settings on the system through Security | Permissions.
TIP: Users who log directly on to their own systems (locally, not as a member of the domain) as Administrator can make any desired changes to their local Registry. This produces a significant security and administrative risk. To prevent the user from logging on locally, change the Administrator password at every machine. Even though this is time-consuming, it provides a level of security that is worth the effort.
The three bears wouldn't have wondered if they had auditing in place. With auditing, you can tell who has been editing the Registry, and whether those edits occurred locally or from a remote location.
The person editing the Registry has no idea that he is being audited. There is no noticeable overhead or warning. Though you may have chosen the Everyone group to audit, the reporting of the audit is done individually. All results of the audit are posted in the security log in Event Viewer.
NOTE: User rights and auditing can be a very sensitive issue. Auditing someone's activities without notification may violate individual rights. Inclusion of the phrase "We reserve the right to restrict access and audit usage of files, directories, and the Registry without subsequent notice" (or similar language) in your security policy is important. Consult your attorney for exact language and restrictions.
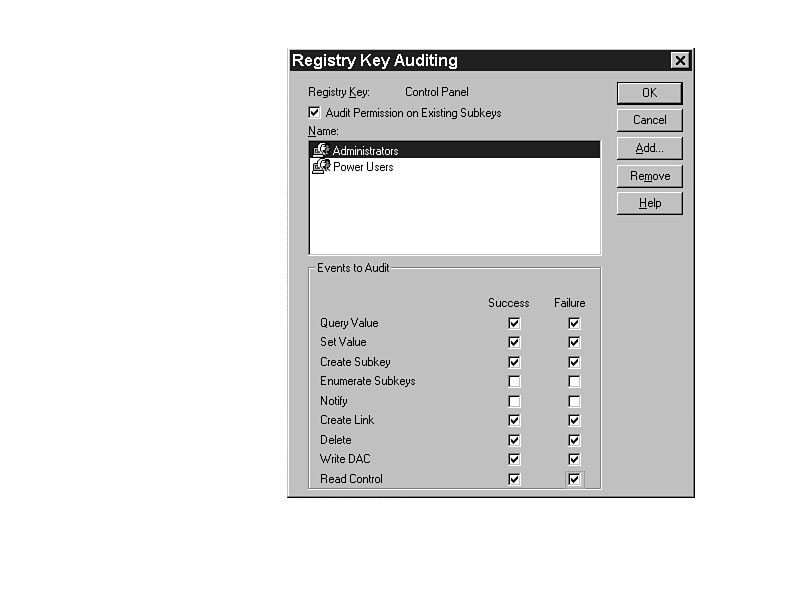
To activate auditing, select Security | Auditing, and add the groups or
individuals
to be audited with the Add button. Then choose the success or failure of the action
to report. Figure 9.14 shows the Auditing dialog box, and Table 9.2 contains the
events that may be audited, and a short description of each.
Table 9.2. Events that can be audited.
| Events to Audit | Description |
| Query Value | Reads a value entry from a Registry key |
| Set Value | Sets value entries in a Registry key |
| Create Subkey | Creates subkeys on a selected Registry key |
| Enumerate Subkeys | Audits events that attempt to identify the subkeys of a Registry key, such as expanding the tree view |
| Notify | Notifies events from a key in the Registry |
| Create Link | Creates a symbolic link in a particular key |
| Delete | Deletes a Registry object |
| Write DAC | Changes security permissions of a key |
| Read Control | Reads the security permissions of a key |
Figure 9.14. Auditing access with REGEDT32.EXE.
These events can also be performed by the user called SYSTEM, but that usually
happens during installation or
modification of software and changes in Control Panel.
A user would never log on as SYSTEM; it is reserved for the operating system
internal functions.
WARNING: NEVER remove SYSTEM as a qualified user in the permissions. Doing so may make the changing of the Registry with the Control Panel or software installation impossible. Changes will not take effect, and the software may be unusable.
NOTE: Auditing the failure of access to the Registry is as important as auditing the successful editing. Knowing that a restricted user gained access to information is critical, and immediate action is required. However, it is equally important and more timely to know whether a restricted user is trying to access restricted information. Sometimes, learning about and trying to recover from inappropriate access is like recovering all the feathers in the wind. Keeping them protected in the first place is a much better use of time and resources.
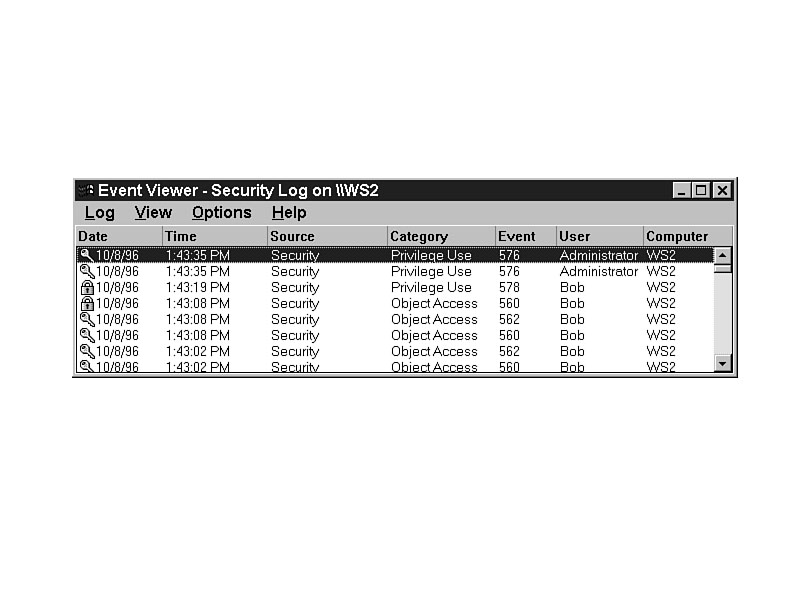
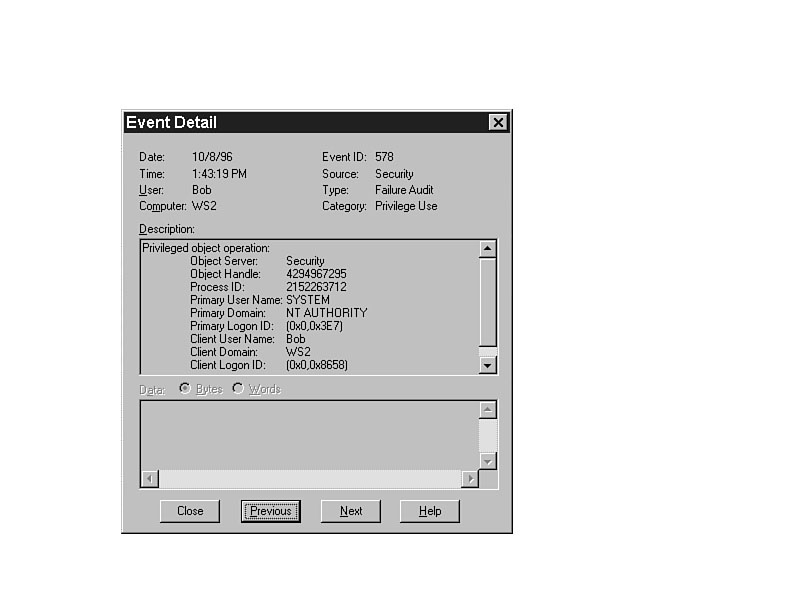
The reporting of auditing results is done in the security log of the Event Viewer. Choose Event Viewer from the Administrative Tools menu, and select Log | Security. (See Figure 9.15.) Any successful items are shown with a key, and unsuccessful attempts are shown with a lock. Double-click the report line for additional details. (See Figure 9.16.)
Figure 9.15. Results of auditing control in Event Viewer.
Figure 9.16. Detail from an audit failure provides important security information.
Even though this is not one of the more enjoyable functions of an administrator,
it may be necessary to protect your organization's information and the integrity
of the systems. The information you get from auditing can also be printed for future
reference by saving it as a text file with Log | Save As and printing the text file.
All Registry entries are owned by the Administrators group. The only reason to own a key or subkey is to select who can or cannot access the Registry. The critical reason that ownership transfer is available is to thwart damage, whether intentional or not, caused by the owner leaving the organization.
If a user takes ownership of a key and its subkeys, that person has the right to determine who has access to it. Conceivably, that user could restrict all access to the key prior to leaving the organization. If no others had access to the data, reinstallation might be required to restore the capability to edit the data. However, regardless of the user, regardless of the restriction (even if the Administrator was given the No Access permission), it is impossible to prevent Administrator from taking ownership. That ability is fundamental in maintaining system security. The Administrator is the only one who can keep the data from going into a black hole, a location from which there is no return.
WARNING: Be careful to whom you give the Administrator password. It's almost always impossible to restrict the Administrator. He has access to any files on the network, in any directory, plus access to the Registry for any user/computer on the network. He cannot be restricted. That is why you also need to secure your Administrator password, and only give it to a few trusted people. Widespread use of the Administrator user name and password seriously compromises the security of the network.
To take ownership of a key, highlight the key, select Security | Owner, and click Take Ownership. At that point, you have Full Control permissions and can choose to whom you want to grant or restrict access.
Occasionally, it would be nice to have the data in the Registry in a text format. You might use it to determine changes that are made that may not be easily found.
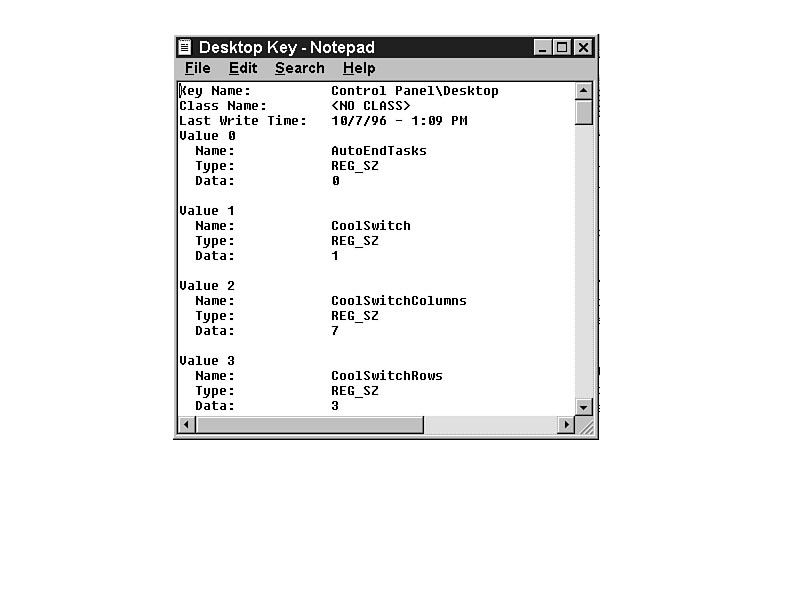
For example, if you want to see the changes made when Control Panel options are exercised, you can take a snapshot of the current Registry using Registry | Save Subtree As and selecting the location and the file name. The data is then written into the file, and it can be read with any text editor or word processor. (See Figure 9.17.)
Figure 9.17. Exported data from HKEY_CURRENT_USER\Control Panel.
After you make the changes, you can export the data into a second text file. Using
your word processor, you can compare the two
documents to see the actual changes.
The Registry changes can be used later to customize the Registry as needed.
Alternately, if two systems perform differently but are said to be set up in exactly the same way, you can use this tool to find out whether that is really the case. Usually, there are differences in the Registry that make the two systems work differently.
Although Microsoft does not support it, they still include in REGEDT32.EXE the capability to export a section of the Registry to a file, edit the file, and put it back into the Registry. Generally, this is used by programmers to test the viability of proposed changes.
Similarly, you can take a slice of a Registry from one machine and put it into another, overwriting the current Registry entries. I think it is obvious why this is not supported or encouraged by Microsoft. The misuse of this tool can be disastrous. Hardware information and software settings nearly always vary from system to system. However, if you are careful, you can use this to fix a system that is not currently correct. Be very careful. Proceed with extreme caution, and at your own risk.
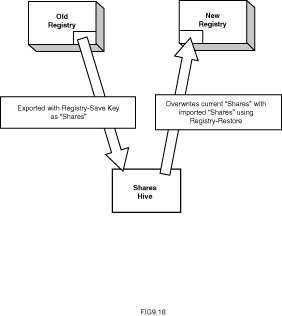
An example of when this tool would be very helpful is in the restoration of shares on the network after a server has crashed. Performing a full restore on top of a currently installed NT system restores the applications, data, and the file and directory permissions to a new server (in the same domain), but not the shares. Re-creating the shares manually may take a long time, and any errors mean the system is down even longer than anticipated. Rather than doing that, use the steps shown in the next section to restore the shares. (See Figure 9.18.)
Figure 9.18. Using part of an old Registry to fix a new one.
TIP: Another example of using the Save Key/Restore Key function would be the copying of Program Manager icons and groups from one machine to another, rather than re-creating them. Use the following procedure and use HKEY_CURRENT_USER\User SID\UNICODE Program Groups as the key to restore.
The step-by-step procedure for restoring the shares from another system is listed here for your convenience.
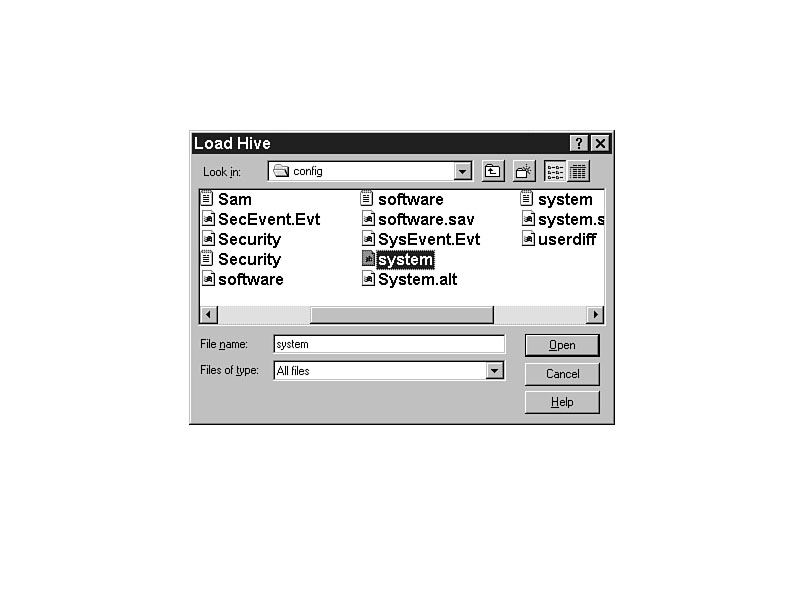
Figure 9.19. Accessing the SYSTEM hive from the old Registry.
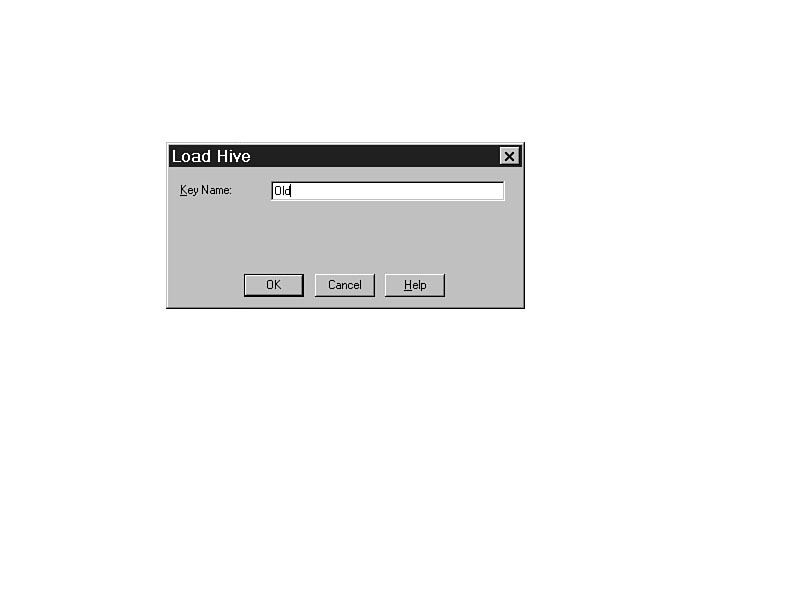
Figure 9.20. Loading Old hive with REGEDT32.EXE.
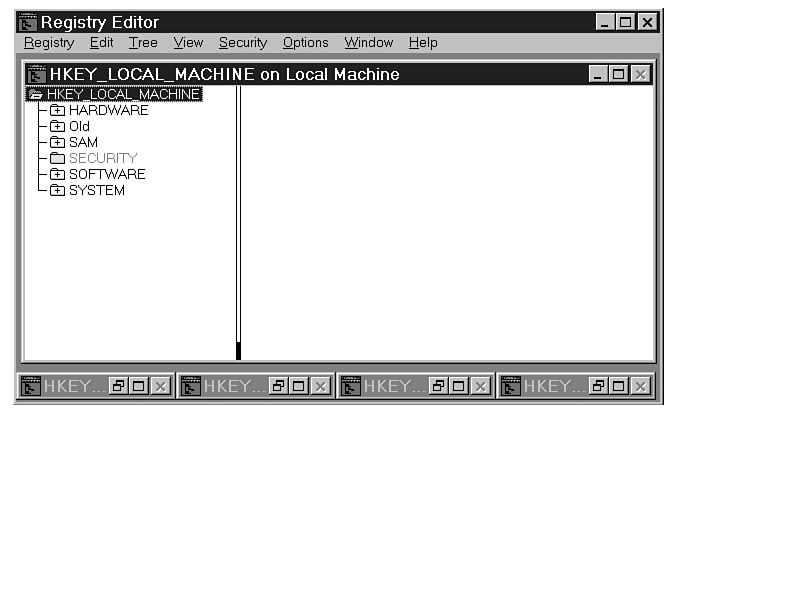
Figure 9.21. HKEY_LOCAL_MACHINE with Old hive loaded.
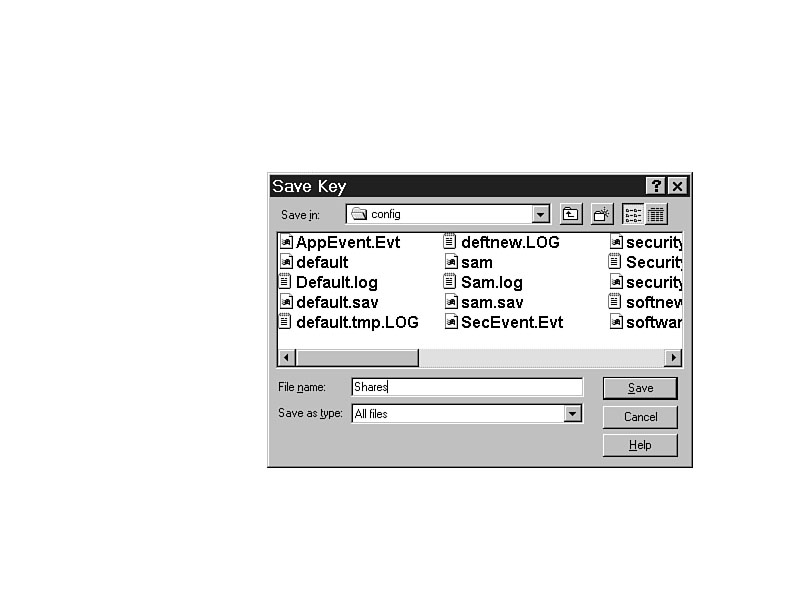
Figure 9.22. Saving part of the Old key as Shares.
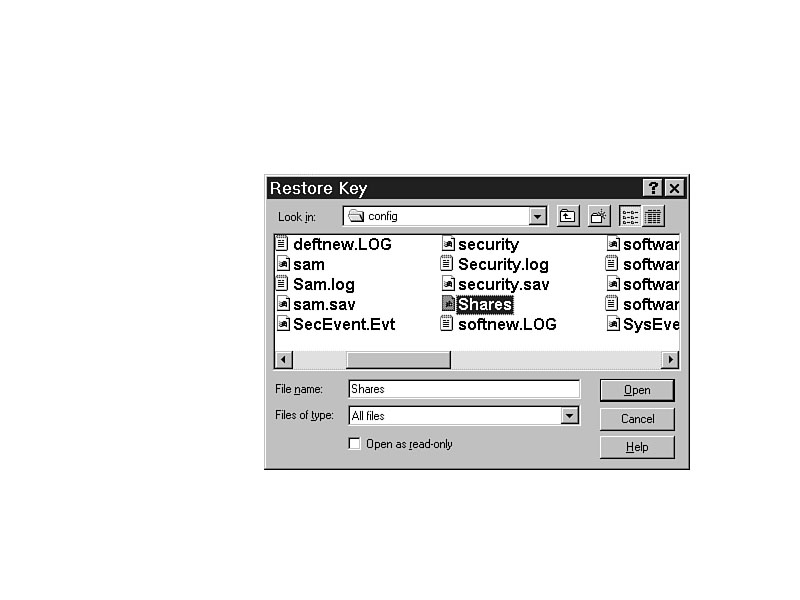
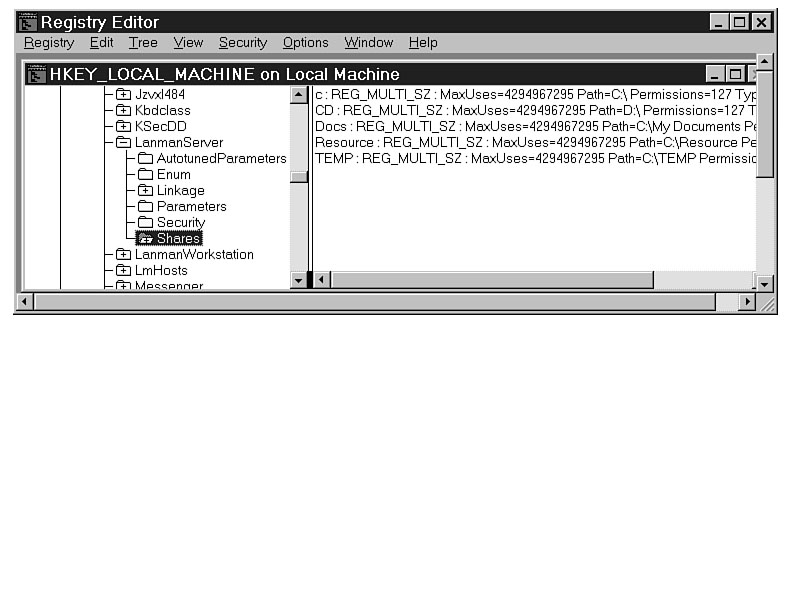
Figure 9.23. Restoring the Shares hive over the original.Figure 9.24. The updated Shares key, showing the new shares available.
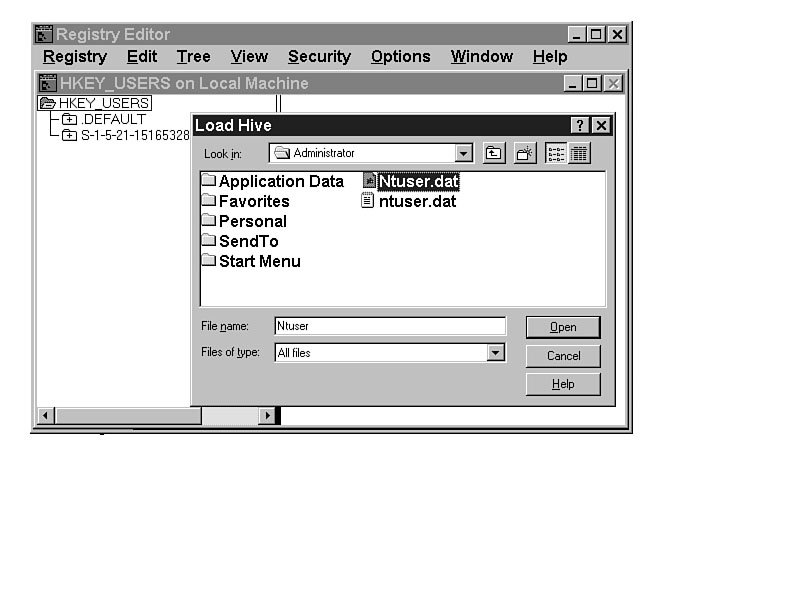
Occasionally, it is necessary to load a Registry hive that is not normally opened in order to edit it. Such is the case with user settings, so you can edit the settings for any user even if he is not logged on to the network.
NOTE: Load Hive only works on HKEY_USERS and HKEY_LOCAL_MACHINE.
Figure 9.25. Opening another users NTUSER.DAT for editing.
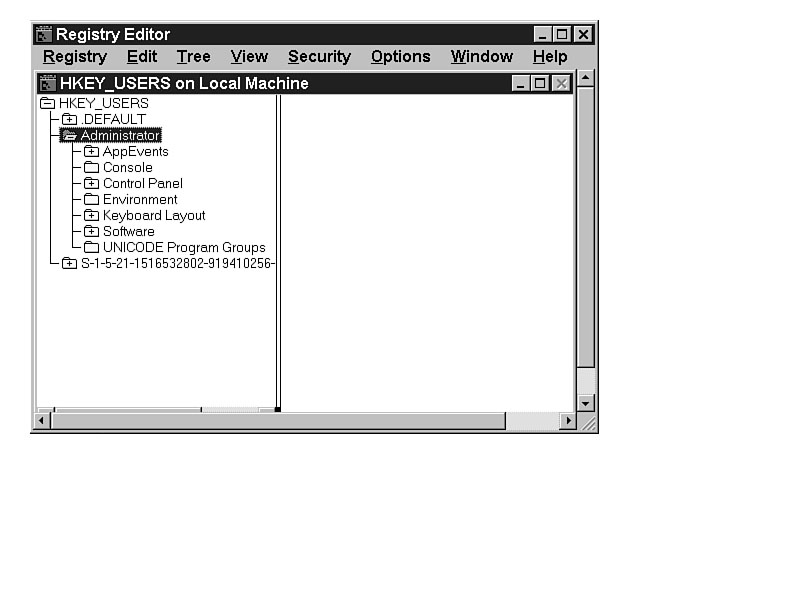
Figure 9.26. The Administrators user settings are available for editing.
The next time the user logs on, those settings will take effect.
REGEDT32.EXE is an extremely powerful editor of the Registry. It provides required security, performance, and ease-of-use features that make it very popular. With proper use, you can edit any of the Registry safely, quickly, and effectively. You can use REGEDT32.EXE to make the everyday changes necessary for maintenance on your own system, and on others throughout the network. The features of security, loading additional hives, and saving and restoring keys makes it a particularly good choice for advanced system administrators.
![]()
![]()
![]()
© Copyright, Macmillan Computer Publishing. All rights reserved.